Wood flooring adds warmth and character to any home, but when it becomes warped, it can quickly turn from a charming feature into an eyesore.
In this ultimate guide, we’ll explore the causes of warped wood flooring, share practical solutions to remedy the issue, and provide tips for prevention to ensure your floors remain beautiful for years to come.
1. Understanding Warped Wood Flooring: Causes and Effects
Warped wood flooring can be a homeowner’s nightmare, manifesting as unsightly bumps, dips, or gaps in what should be a smooth and inviting surface. Understanding the causes and effects of warped wood is the first step towards effective remediation.
Warping typically occurs due to fluctuations in moisture levels, which can cause the wood to expand or contract. This might happen in areas with high humidity, such as basements or kitchens, where spills and leaks are more common. Alternatively, drastic temperature changes can also play a role; for instance, homes with inadequate insulation may see their wood floors warp during the winter months when the heat is cranked up.
There are several factors that can contribute to this pesky problem. One of the most common culprits is improper installation. If wood planks are tightly packed together without leaving adequate space for expansion, the natural movement of the wood can lead to warping over time. Additionally, using low-quality or untreated wood can make floors more susceptible to moisture damage, leading to a higher likelihood of warping.
The effects of warped wood flooring go beyond mere aesthetics. Not only can it create tripping hazards and discomfort underfoot, but it can also lead to more serious structural issues if left unaddressed. Warped boards can create gaps, allowing dirt and debris to accumulate, which can compromise the integrity of your flooring over time.
Moreover, warped wood can negatively impact the overall ambiance of your home. Beautiful wooden floors are often the centerpiece of any room, and when they are damaged, the space can feel less inviting and polished. Therefore, understanding the causes and effects of warped wood flooring is crucial in not just maintaining the beauty of your space, but also in preserving the safety and durability of your home for years to come.
2. Assessing the Extent of the Damage
Before diving into repairs, it’s crucial to assess the extent of the damage to your warped wood flooring. This step will help you determine the best course of action and ensure that your efforts are focused where they are most needed. Start by examining the affected areas closely. Look for signs of warping, such as cupping, crowning, or buckling. Cupping occurs when the edges of the boards are higher than the center, giving them a concave appearance, while crowning is the opposite—where the center of the board is raised. Buckling is more severe, often causing the planks to lift entirely from the subfloor.
Next, take note of the size and location of the damaged sections. Is the warping localized to a few boards, or is it spread throughout an entire room? If it’s just a few planks, you may be able to replace or repair them without tackling the entire floor. On the other hand, if the damage is widespread, it might indicate an underlying issue, such as prolonged water exposure or inadequate installation, which could require more comprehensive solutions.
Don’t forget to check for moisture underneath the flooring. Use a moisture meter to pinpoint any hidden dampness that could exacerbate the warping. Understanding the moisture levels in your wood and subfloor is vital, as moisture issues must be addressed before any repairs can be successfully undertaken.
Lastly, document your findings with photographs and notes. This record will not only help you track the progression of the damage but will also be invaluable if you decide to consult with a professional. By thoroughly assessing the extent of the damage, you’ll be better equipped to choose the right repair methods and restore your wood flooring to its former glory.
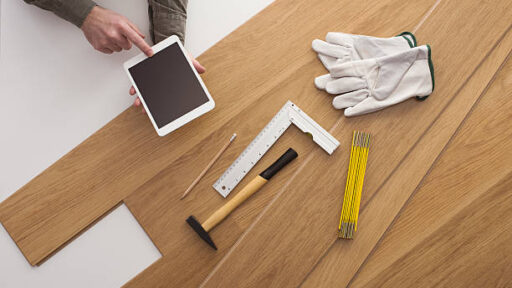
3. Tools and Materials You’ll Need
Before diving into the process of fixing warped wood flooring, it’s essential to gather the right tools and materials to ensure a smooth and successful repair. Having everything on hand not only saves time but also helps you tackle the project with confidence. Here’s a comprehensive list of what you’ll need:
a. Moisture Meter
Understanding the moisture content of your wood flooring is crucial, as excess moisture is often the culprit behind warping. A moisture meter will allow you to assess the current condition of the wood and determine if additional drying or treatment is necessary.
b. Floor Scraper or Putty Knife
For any stubborn areas where the wood has buckled or lifted, a floor scraper or putty knife can help you gently pry and smooth out the warped sections. This tool is especially useful for removing any debris or old adhesive that may interfere with the repair.
c. Clamps
If you’re dealing with significant warping or gaps between planks, clamps will be invaluable. These tools help hold the wood in place while it dries or sets, ensuring a tight fit and preventing future issues.
d. Wood Glue or Epoxy
Depending on the extent of the damage, you may need strong adhesives to bond warped pieces back together or fill in gaps. Wood glue works well for minor repairs, while epoxy is better suited for larger cracks or splits.
e. Sandpaper and Orbital Sander
Once the warped areas have been addressed, you may need to sand down any uneven surfaces to create a smooth finish. Sandpaper in various grits, along with an orbital sander, will help you achieve the desired level of smoothness.
f. Wood Filler
For minor gaps or holes left after repairs, wood filler is a great solution. Choose a filler that matches the color of your flooring to ensure a seamless appearance once the job is complete.
g. Finish or Stain
After repairing and sanding, it’s important to protect your wood floor. Select a suitable finish or stain that complements your flooring and provides a durable layer of protection against future moisture and wear.
h. Safety Gear
Don’t forget about safety! Equip yourself with gloves, goggles, and a dust mask to protect yourself from debris and harmful particles during the repair process.
4. Safety Precautions to Consider Before Starting
Before diving into the task of fixing warped wood flooring, it’s crucial to prioritize safety. Working with tools and materials can pose various risks, so taking the necessary precautions ensures that your project goes smoothly and without injury.
First and foremost, ensure you have the right personal protective equipment (PPE). A sturdy pair of safety goggles will shield your eyes from dust and debris, while a good quality mask will help filter out any harmful particles that may arise during the sanding or cutting processes. Don’t forget about hearing protection if you’re using power tools that can produce loud noises.
Next, assess your workspace. Clear the area of any hazards, such as loose cables, furniture, or small objects that could cause tripping. A clean, organized workspace not only helps you focus but also minimizes the risk of accidents. Additionally, ensure your tools are in good working condition—dull blades and malfunctioning equipment can lead to unexpected injuries.
Consider the ventilation of your workspace as well. If your project involves using adhesives, stains, or finishes, ensure the area is well-ventilated to avoid inhaling fumes. Open windows and doors, or use fans to circulate air, creating a safe environment for you to work in.
Lastly, if you’re dealing with extensive damage or mold in your wood flooring, it may be wise to consult with professionals before proceeding. Mold can pose significant health risks, and understanding the extent of damage will guide you on whether a DIY approach is adequate or if expert intervention is necessary.
5. Temporary Solutions: How to Minimize the Impact
When faced with the unsightly presence of warped wood flooring, immediate action may not always be feasible. However, several temporary solutions can help minimize the impact while you plan for a more permanent fix. Understanding these strategies can alleviate some frustration and restore a semblance of normalcy to your space.
First and foremost, consider using area rugs or strategically placed furniture to cover the affected areas. A soft, stylish rug can not only hide imperfections but also add warmth and texture to your room, creating a cozy atmosphere. Larger pieces of furniture, like sofas or coffee tables, can similarly be positioned to divert attention away from warped planks, allowing you to maintain the aesthetic appeal of your space.
Another effective approach is to adjust humidity levels in your home. Warping often occurs due to fluctuations in moisture content, so utilizing a dehumidifier or air conditioner can help stabilize the environment. This not only minimizes further warping but can also offer relief from the visible effects of existing damage.
Conversely, if your space is too dry, consider adding a humidifier to combat the issue.
If the warping is localized, you might also explore the option of using weight or pressure to help flatten those warped areas. Placing heavy books or weights on the warped boards for an extended period may gradually encourage them to return to their original position. Just be sure to cover the surface with a cloth to prevent any marks or scratches.
Lastly, while these temporary solutions can provide some relief, it’s crucial to keep the lines of communication open with a flooring professional. Documenting the extent of the warping and noting any changes over time will help when you are ready to address the issue more permanently.
6. Step-by-Step Guide to Repairing Minor Warps
Repairing minor warps in your wood flooring can be a manageable task with the right approach and tools. Here’s a step-by-step guide to help you get your floors back to their original glory.
Step 1: Identify the Problem Areas
Begin by walking through your space and identifying the sections of flooring that are warped. Look for any noticeable bumps, dips, or uneven planks. Once you’ve marked these areas, you’ll have a clear idea of where to focus your efforts.
Step 2: Gather Your Tools
You’ll need a few essential tools for this task: a hammer, a pry bar, wood glue, clamps, a damp cloth, and possibly a heat gun. Having everything on hand will streamline the repair process.
Step 3: Moisture Check
Before proceeding, check the humidity levels in your home. Warping is often caused by excess moisture. If the air is too humid, consider using a dehumidifier to bring the levels down before starting repairs.
Step 4: Lift the Warped Plank
Using your pry bar, gently lift the warped plank from the subfloor. Be careful not to damage surrounding planks. If the plank is glued down, you might need to apply a bit of heat using a heat gun to loosen the adhesive.
Step 5: Apply Wood Glue
Once the plank is lifted, apply wood glue to the underside. This will help secure it back to the subfloor once it’s placed back down. If the warp is significant, it might help to dampen the wood slightly to make it more pliable.
Step 6: Reposition and Clamp
Carefully place the plank back into its original position. Use clamps to hold it down while the glue sets. This is crucial for ensuring a tight bond and a smooth surface. Leave it clamped for at least a few hours or as recommended by the glue manufacturer.
Step 7: Final Touches
Once the glue has dried, remove the clamps and check the plank for any remaining warps. If needed, you can sand down any uneven edges to create a seamless look. Finally, clean the area to remove any excess glue or debris.
Step 8: Prevention
To prevent future warping, ensure your home maintains consistent humidity levels, and consider using area rugs in high-moisture zones. Regular maintenance and monitoring can go a long way in preserving the beauty of your wood floors.
By following these steps, you can effectively repair minor warps in your wood flooring, restoring its elegance and functionality. With a little patience and care, your floors will not only look great but also stand the test of time.